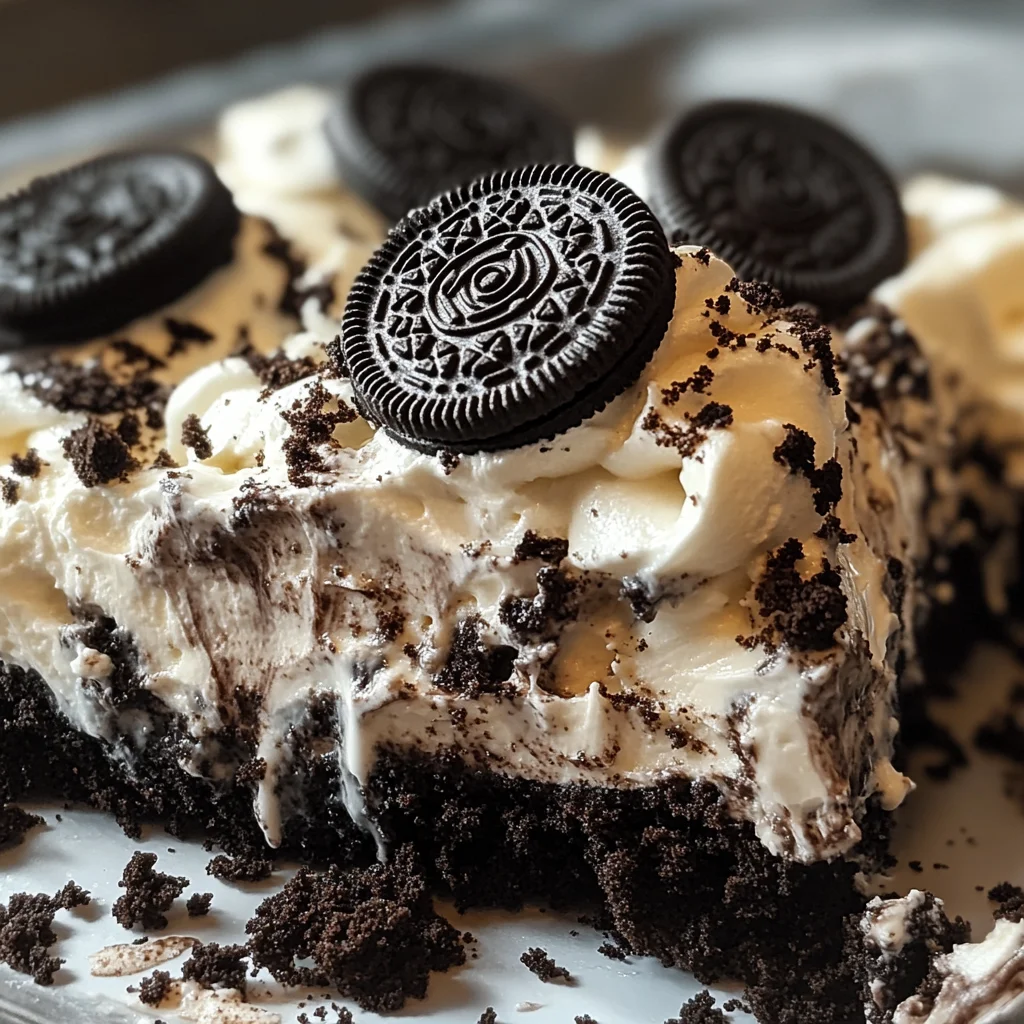
Oreo Dump Cake Recipe
If you’re looking for a dessert that combines simplicity with mouthwatering flavor, then this Oreo Dump Cake Recipe is just what you need! It’s one of those treats that brings everyone together, whether it’s a cozy family night or a lively gathering with friends. With just a handful of ingredients and minimal effort, you can whip up something so deliciously sweet and creamy that it will have everyone reaching for seconds.
This recipe is special because it captures the beloved flavors of Oreo cookies and chocolate cake in one delightful dish. Plus, it’s perfect for busy days when you want to impress your guests without spending hours in the kitchen. Trust me, once you make this Oreo Dump Cake, it’ll become your go-to dessert!
Why You’ll Love This Recipe
- Easy to Make: With only a few simple steps, you’ll have a stunning dessert ready in no time.
- Family-Friendly: Everyone loves Oreos! This cake will be a hit with both kids and adults.
- Make-Ahead Convenience: Prepare it ahead of time and pop it in the oven when you’re ready to serve.
- Endless Flavor: The layers of creaminess and rich chocolate flavor are simply irresistible.
- Great for Any Occasion: Whether it’s a birthday party or just a Tuesday night treat, this cake fits right in!
Ingredients You’ll Need
To create this delicious Oreo Dump Cake, you’ll need some simple and wholesome ingredients. Gather these items, and get ready for an easy baking adventure!
Ingredients:
– 25 Oreo cookies
– 14 oz can Sweetened Condensed Milk
– 8 oz Whipped Topping (Cool Whip), not frozen
– 15¼ oz Chocolate cake mix
– ½ cup Sweet Salted Butter, sliced
Variations
The great thing about this Oreo Dump Cake Recipe is its flexibility! Feel free to get creative and make it your own with these fun variations:
- Add Some Fruit: Toss in some fresh berries or banana slices for a fruity twist.
- Mix Up the Cookies: Try using other types of cookies like chocolate chip or peanut butter for different flavors.
- Swirl in Peanut Butter: Drizzle some creamy peanut butter on top before baking for added richness.
- Go Nutty: Sprinkle chopped nuts on top before baking for an extra crunch.
How to Make Oreo Dump Cake Recipe
Step 1: Preheat Your Oven
Start by preheating your oven to 350°F (175°C). This step is crucial because a properly heated oven ensures even cooking throughout the cake.
Step 2: Prepare the Base
In a 9×13-inch baking dish, crush the Oreo cookies and spread them evenly across the bottom. This cookie layer will provide a delicious foundation for the rest of the dessert.
Step 3: Add Sweetened Condensed Milk
Pour the sweetened condensed milk over the crushed Oreos. This ingredient adds moisture and sweetness to our cake while creating a luscious layer that complements the cookies perfectly.
Step 4: Spread Whipped Topping
Dollop the whipped topping (Cool Whip) over the condensed milk layer and gently spread it out. This fluffy layer gives the cake its creamy texture and balances out the rich chocolate flavors.
Step 5: Sprinkle Chocolate Cake Mix
Evenly sprinkle the chocolate cake mix on top of the whipped topping. Remember not to mix any layers; we want each component to shine through as they bake together!
Step 6: Top with Butter
Slice your butter into thin pieces and place them evenly on top of the cake mix. The melting butter will help create that golden brown crust we all love while adding richness to every bite.
Step 7: Bake
Place your dish in the preheated oven and bake for 35-40 minutes. Keep an eye on it until the top turns golden brown and looks irresistible!
Step 8: Cool & Serve
Allow the dump cake to cool slightly before serving. It’s fantastic warm, especially with extra whipped topping or even a scoop of vanilla ice cream if you’re feeling extra indulgent! Enjoy this delightful treat with family and friends—you’ll be glad you did!
Pro Tips for Making Oreo Dump Cake Recipe
This Oreo Dump Cake is a breeze to make, but a few expert tips can take it from great to absolutely spectacular!
-
Crush Oreos evenly: Ensuring that the Oreos are crushed uniformly allows for an even distribution of flavor and texture throughout the cake. A food processor works wonderfully for this!
-
Use room temperature ingredients: Allowing your sweetened condensed milk and whipped topping to come to room temperature helps them mix better and creates a smoother texture in your dump cake.
-
Layer carefully: When adding each layer, avoid mixing them together. The distinct layers create a beautiful presentation and ensure that every bite has a variety of flavors.
-
Check doneness: Ovens vary, so keep an eye on your cake as it bakes. Look for a golden-brown top and use a toothpick to check if the cake mix is cooked through; it should come out clean or with just a few crumbs.
-
Let it cool slightly: Allowing the cake to cool for about 10 minutes before serving helps set the layers and makes it easier to cut into neat pieces.
How to Serve Oreo Dump Cake Recipe
Serving this delightful dessert can be as fun as making it! Here are some ideas to make your Oreo Dump Cake truly shine at any gathering.
Garnishes
- Chocolate drizzle: A simple drizzle of chocolate syrup over the top adds an extra touch of sweetness and looks visually appealing.
- Crushed Oreos: Sprinkle some additional crushed Oreos on top for added crunch and to enhance that classic Oreo flavor.
- Fresh berries: Adding fresh raspberries or strawberries not only brings a pop of color but also provides a refreshing contrast to the rich chocolate flavors.
Side Dishes
- Vanilla ice cream: A scoop of creamy vanilla ice cream complements the rich flavors of the dump cake perfectly, creating a delightful temperature contrast.
- Whipped topping: Serve with extra whipped topping on the side so guests can add their desired amount, making each slice customizable.
- Fruit salad: A light fruit salad made with seasonal fruits offers a refreshing balance against the sweet richness of the dump cake.
- Coffee or tea: Providing guests with warm beverages like coffee or herbal tea pairs beautifully with dessert, rounding out the meal nicely while enhancing flavors.
Now you’re all set to impress your friends and family with this deliciously easy Oreo Dump Cake! Enjoy every bite!

Make Ahead and Storage
This Oreo Dump Cake is a fantastic option for meal prep, as it can be made ahead of time and stored for later enjoyment. Whether you’re preparing for a gathering or simply want to indulge yourself, this dessert keeps well!
Storing Leftovers
- Allow the dump cake to cool completely before storing.
- Cover the baking dish with plastic wrap or aluminum foil to keep it fresh.
- Store in the refrigerator for up to 3-4 days.
Freezing
- Let the dump cake cool down completely before freezing.
- Cut it into individual portions for easier thawing later.
- Wrap each piece tightly in plastic wrap, then place them in an airtight container or freezer bag.
- Freeze for up to 2-3 months.
Reheating
- To reheat individual portions, place them on a microwave-safe plate and warm them in the microwave for about 20-30 seconds.
- For reheating the entire cake, preheat your oven to 350°F (175°C) and bake covered with foil for about 10-15 minutes.
FAQs
Here are some common questions about this delightful dessert!
Can I make this Oreo Dump Cake Recipe gluten-free?
Absolutely! You can easily substitute the chocolate cake mix with a gluten-free version. Just check that all other ingredients, like Oreos and whipped topping, are gluten-free as well.
How long does this Oreo Dump Cake Recipe last?
When stored properly in the refrigerator, this Oreo Dump Cake lasts about 3-4 days. It’s perfect for making ahead of time!
Can I use homemade whipped cream instead of Cool Whip?
Yes! While Cool Whip adds convenience, you can definitely use homemade whipped cream if you prefer a fresher taste. Just make sure it’s not frozen when layering.
Can I customize the flavors of this Oreo Dump Cake Recipe?
Definitely! Feel free to experiment by adding different types of crushed cookies or flavored cake mixes. You could even add chocolate chips or nuts for extra texture!
Final Thoughts
I hope you enjoy making this delicious Oreo Dump Cake Recipe—it truly is a crowd-pleaser! With its layers of creamy goodness and irresistible chocolate flavor, it’s bound to become a favorite at your gatherings. Don’t hesitate to share it with friends and family; they’ll love it just as much as you do! Happy baking!
Oreo Dump Cake Recipe

Indulge in the delightful experience of making this easy Oreo Dump Cake Recipe, a perfect dessert for any occasion! Combining the classic flavors of Oreo cookies with rich chocolate cake, this treat is sure to please both kids and adults alike. With minimal effort and just a few simple ingredients, you can create a creamy, layered dessert that’s ideal for family gatherings or casual get-togethers. Whether served warm with a scoop of vanilla ice cream or chilled and topped with extra whipped topping, each bite offers an irresistibly sweet experience. Get ready to impress your guests with this crowd-pleaser that’s bound to become a favorite!
- Prep Time: 10 minutes
- Cook Time: 40 minutes
- Total Time: 50 minutes
- Yield: Serves approximately 12 people 1x
- Category: Dessert
- Method: Baking
- Cuisine: American
Ingredients
- 25 Oreo cookies
- 14 oz can Sweetened Condensed Milk
- 8 oz Whipped Topping (Cool Whip), not frozen
- 15¼ oz Chocolate cake mix
- ½ cup Sweet Salted Butter, sliced
Instructions
- Preheat oven to 350°F (175°C).
- Crush the Oreo cookies and spread them evenly in a 9×13-inch baking dish.
- Pour the sweetened condensed milk over the crushed Oreos.
- Spread the whipped topping over the condensed milk layer.
- Evenly sprinkle the chocolate cake mix on top without mixing.
- Top with slices of butter distributed evenly.
- Bake for 35-40 minutes until golden brown on top.
- Allow to cool slightly before serving.
Nutrition
- Serving Size: 1 serving
- Calories: 220
- Sugar: 18g
- Sodium: 125mg
- Fat: 10g
- Saturated Fat: 6g
- Unsaturated Fat: 3g
- Trans Fat: 0g
- Carbohydrates: 29g
- Fiber: 1g
- Protein: 2g
- Cholesterol: 25mg